
- You may also like
- Customize Popular Posts Widgets with jQuery for Blogger.
- Replace Popular Posts Title with an Image
✔ Features :
- Control over 'Image thumbnail' view. Although it is recommended not to check 'Image thumbnail' check-box for the better view (and performance) of this widget.
✔ Screenshot :
 All right, let's proceed.
 Before you make any changes in your blogger template, it is recommended to backup your blog in case something goes wrong.
It is just a cautionary statement. Don’t get scared. Just stay serious.
It is just a cautionary statement. Don’t get scared. Just stay serious.
- Sign in to Blogger.
- Click the Drop-down arrow adjacent to 'Go to post list' icon.
- Click 'Layout' form the drop-down menu list. It will show you layouts of different widgets (or gadgets) of your blog.
- Click 'Add a Gadget' link as shown in the fig below. A new window will open that contains list of all gadgets available.
- Scroll down and when you see 'Popular Posts' gadget, click on it or click the '+' icon as shown in fig below.
- This will take you to a new window named as 'Configure Popular Posts'.
- Select the 'Most viewed' option to 'All time'.
- Select number of the post(s) in 'Display up to' section.
- Check 'snippet' but uncheck 'image thumbnail'. This is important.
- Hit 'Save'.
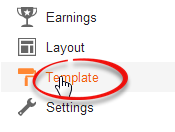
If your blog already contains this widget, you don't need to repeat the above part. - Click 'Template'.
- Click 'Edit HTML' (if you are using old interface of blogger, make sure that 'Expand Widget Templates' is checked).
- Search for (Ctrl+f) </b:skin and paste these codes before </b:skin
- Hit 'Save template'



/* Popular Post style using CSS3 by Bloganalyzer
-----------------------------------------------------*/
.PopularPosts .widget-content ul li{
position: relative;
padding: 0;
}
.PopularPosts .item-snippet {
position: absolute;
left: 20px;
top: 100px;
font-size: 15px;
line-height: 1.2em;
width: 230px;
background-color: #ececec;
padding: 7px;
border-top: 2px solid #0009ca;
z-index: 2;
height: 4.5em;
visibility: hidden;
opacity: 0;
transition: all 0.6s ease;
-moz-transition: all 0.6s ease;
-webkit-transition: all 0.6s ease;
-o-transition: all 0.6s ease;
}
.PopularPosts .item-snippet:before {
content: "";
position: absolute;
left: 10px;
top: -8px;
height: 0;
width: 0;
border-bottom: 7px solid #0009ca;
border-left: 5px solid transparent;
border-right: 5px solid transparent
}
.PopularPosts .widget-content ul li:hover .item-snippet{
top: 105%;
opacity: 1;
visibility: visible;
}
.PopularPosts .item-title{
font-size: 20px;
padding-left: 5px;
}


Comments left on this site will be moderated. Note that all comments with abusive, disruptive or explicit content and comments with links will be deleted immediately.
0 comments so far on 'Customize Popular Post Widget with CSS3 '