
The main reason for using css instead of java-script or jQurey is that it requires less time for loading of the page. Also css properties are very easy to understand as well as to implement. Hope you will enjoy it.
- You may also like
- Customize Popular Posts Widgets with jQuery for Blogger.
- Replace Popular Posts Title with an Image
✔ Features :
- You can control over 'Image thumbnail' view. Although it is recommended not to check 'Image thumbnail' check-box for the better view (and performance) of this widget.
✔ Screenshot :
 All right, let's proceed.
 Before you make any changes in your blogger template, it is recommended to backup your blog in case something goes wrong.
It is just a cautionary statement. Don’t get scared. Just stay serious.
Let's proceed. It is just a cautionary statement. Don’t get scared. Just stay serious.
- Sign in to Blogger.
- Click the drop-down arrow adjacent to 'Go to post list' icon and select 'Layout' form the drop-down menu list.
- Click 'Add a Gadget' link as shown in the fig below. A new window will open that contains list of all gadgets available.
- Scroll down and select 'Popular Posts' gadget or the '+' icon as shown in fig below.
- This will take you to a new window named as 'Configure Popular Posts'.
- Select the 'Most viewed' option to 'All time'.
- Select number of the post(s) in 'Display up to' section.
- Check 'snippet' but uncheck 'image thumbnail'. This is important.
- Hit 'Save'.
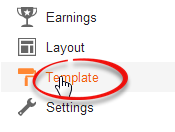
- Click 'Template'.
- Click 'Edit HTML' (if you are using old interface of blogger, make sure that 'Expand Widget Templates' is checked).
- Search for (Ctrl+f) </b:skin and paste these codes before </b:skin
- Hit 'Save template'



/* Popular Post style using CSS3 by Bloganalyzer
-----------------------------------------------------*/
#PopularPosts1 li {
    font-size: 25px;
    height: 3em;
}
li .item-content {
    -webkit-transform-style: preserve-3d;
    -moz-transform-style: preserve-3d;
    -ms-transform-style: preserve-3d;
    transform-style: preserve-3d;
    position: relative;
}
li .item-title, li .item-snippet {
    position: absolute;

    -webkit-transition: -webkit-transform 1s ease-in-out;
    -moz-transition: -moz-transform 1s ease-in-out;
    -o-transition: -o-transform 1s ease-in-out;
    -ms-transition: -ms-transform 1s ease-in-out;
    transition: transform 1s ease-in-out;

    -ms-backface-visibility: hidden;
    -webkit-backface-visibility: hidden;
    -moz-backface-visibility: hidden;
    backface-visibility: hidden;
}
li:hover .item-title {
    text-align: left;

    -webkit-transform: rotateY(180deg);
    -moz-transform: rotateY(180deg);
    -o-transform: rotateY(180deg);
    -ms-transform: rotateY(180deg);
    transform: rotateY(180deg);
}
li .item-snippet {
    text-align: justify;
    font-size: 16px;

    -webkit-transform: rotateY(-180deg);
    -moz-transform: rotateY(-180deg);
    -o-transform: rotateY(-180deg);
    -ms-transform: rotateY(-180deg);
    transform: rotateY(-180deg);
}
li:hover .item-snippet {
    -webkit-transform: rotateY(0deg);
    -moz-transform: rotateY(0deg);
    -o-transform: rotateY(0deg);
    -ms-transform: rotateY(0deg);
    transform: rotateY(0deg);
}


Comments left on this site will be moderated. Note that all comments with abusive, disruptive or explicit content and comments with links will be deleted immediately.
0 comments so far on 'Customize Popular Post Widget with CSS3'